Earlier today, Meta’s Threads.net microblogging social network rolled out its much-anticipated Fediverse feature to over 100 countries (except for European Union members), including many in the Asia-Pacific region. If you’re keen on expanding your audience as a content creator, or as a content consumer you want to follow content creators without creating yet another account, activating this feature is highly recommended.
But what exactly is the Fediverse?
What is the Fediverse?
In simple terms, the Fediverse is a mycelium network powered by the ActivityPub protocol. ActivityPub is a web standard endorsed by the World Wide Web Consortium (W3C), the authoritative body for web standards ensuring seamless interoperability across platforms. Some examples are SMTP for emails, HTTP/S for browsing, and HTML and CSS for websites. This makes the Fediverse essentially the web standard for social networking services (SNS), commonly referred to as social media in English-speaking countries.
What’s in it for me as a content creator/consumer?
Activating the Fediverse feature on your Threads.net account allows you to reach a broader audience. As a content creator, your fans more likely urged you before to join yet another network where they already are. Or, as a content consumer, you had no choice but to create a new account on yet another platform just to follow a content creator. With the Fediverse, content creators and content consumers can interact across different platforms, as long as both sides are connected to the Fediverse. This means fewer accounts to manage for both content creators and content consumers.
How to activate the Fediverse feature in Threads.net?
It’s straightforward. Follow these steps:
-
Go to
Settings>Account>Fediverse sharing.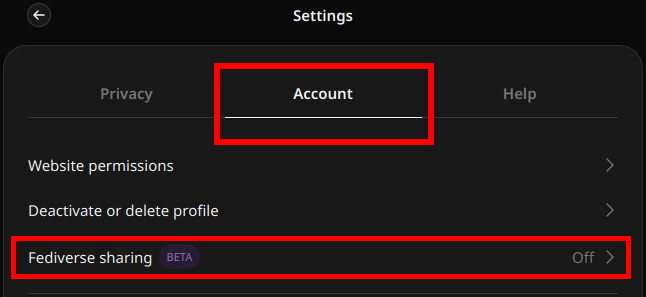
How to activate Fediverse Threads: Step 1
How to activate Fediverse Threads: Step 1 by I’M YourOnly.One is licensed under Creative Commons Attribution-ShareAlike (CC By-SA) 4.0 International License.
Date: 2024-06-26T05:11:42+08:00 -
Read their version of “What is the Fediverse?” and tap
Next.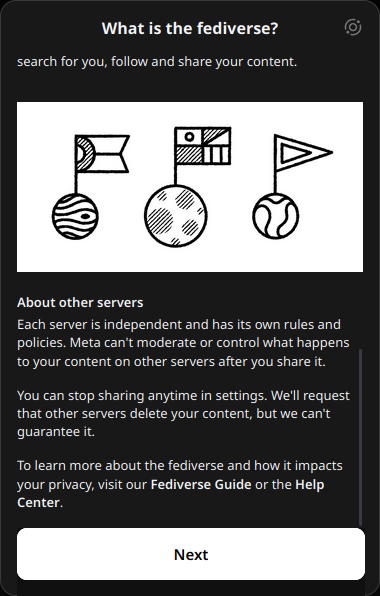
How to activate Fediverse Threads: Step 2
To the extent possible under law, I'M YourOnly.One has waived all copyright and related or neighbouring rights to How to activate Fediverse Threads: Step 2. This work is published from Philippines.
-
Read the additional information provided and tap
Turn on sharing.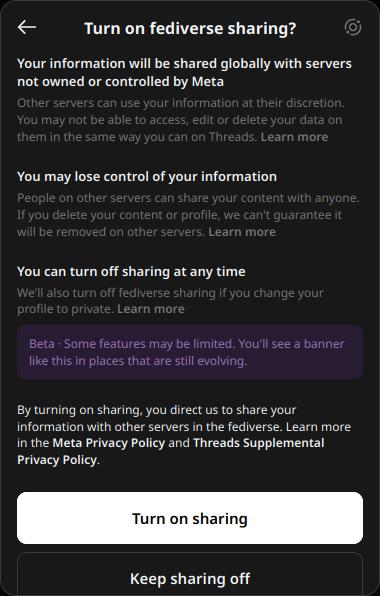
How to activate Fediverse Threads: Step 3
To the extent possible under law, I'M YourOnly.One has waived all copyright and related or neighbouring rights to How to activate Fediverse Threads: Step 3. This work is published from Philippines.
-
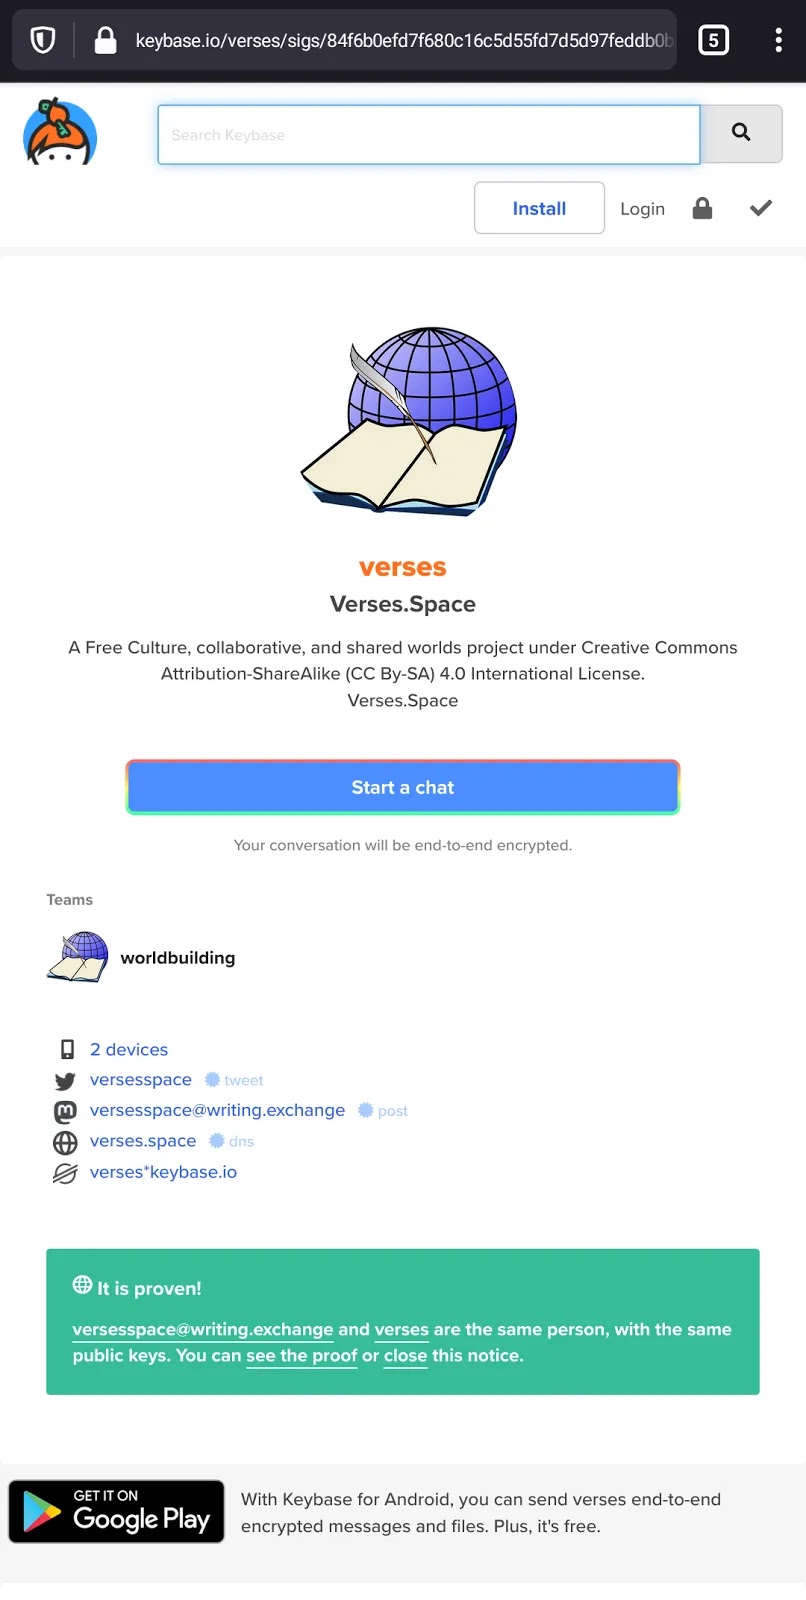
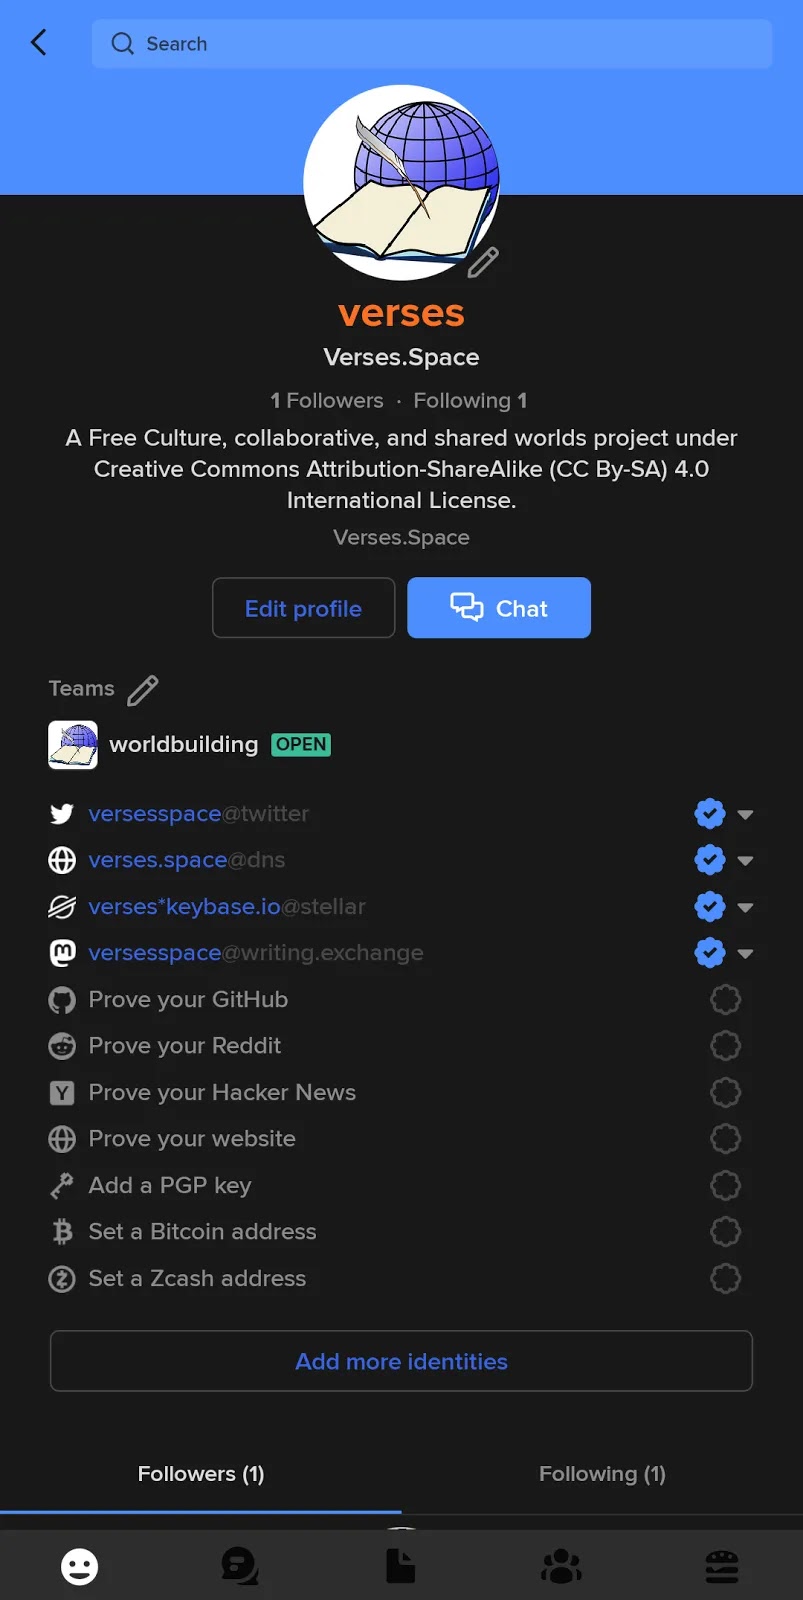
Copy your Threads.net Fediverse username and share it with everyone!
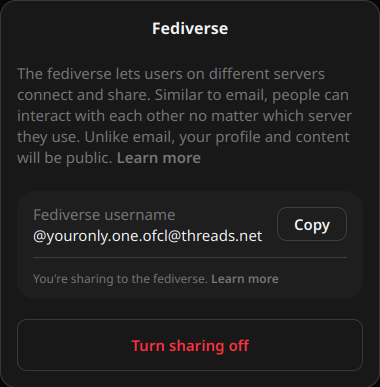
Welcome to the standards-based Fediverse mycelium network
Copy and share your Fediverse Threads username
Welcome to the standards-based Fediverse mycelium network by I’M YourOnly.One is licensed under Creative Commons Attribution-ShareAlike (CC By-SA) 4.0 International License.
Date: 2024-06-26T05:13:47+08:00
Congratulations! You’re now part of the Fediverse mycelium network! Your posts will be visible to any account connected to the Fediverse, no matter the platform they’re using.
You don’t have to think about it. Just do your regular social network routine. It all happens in the background.

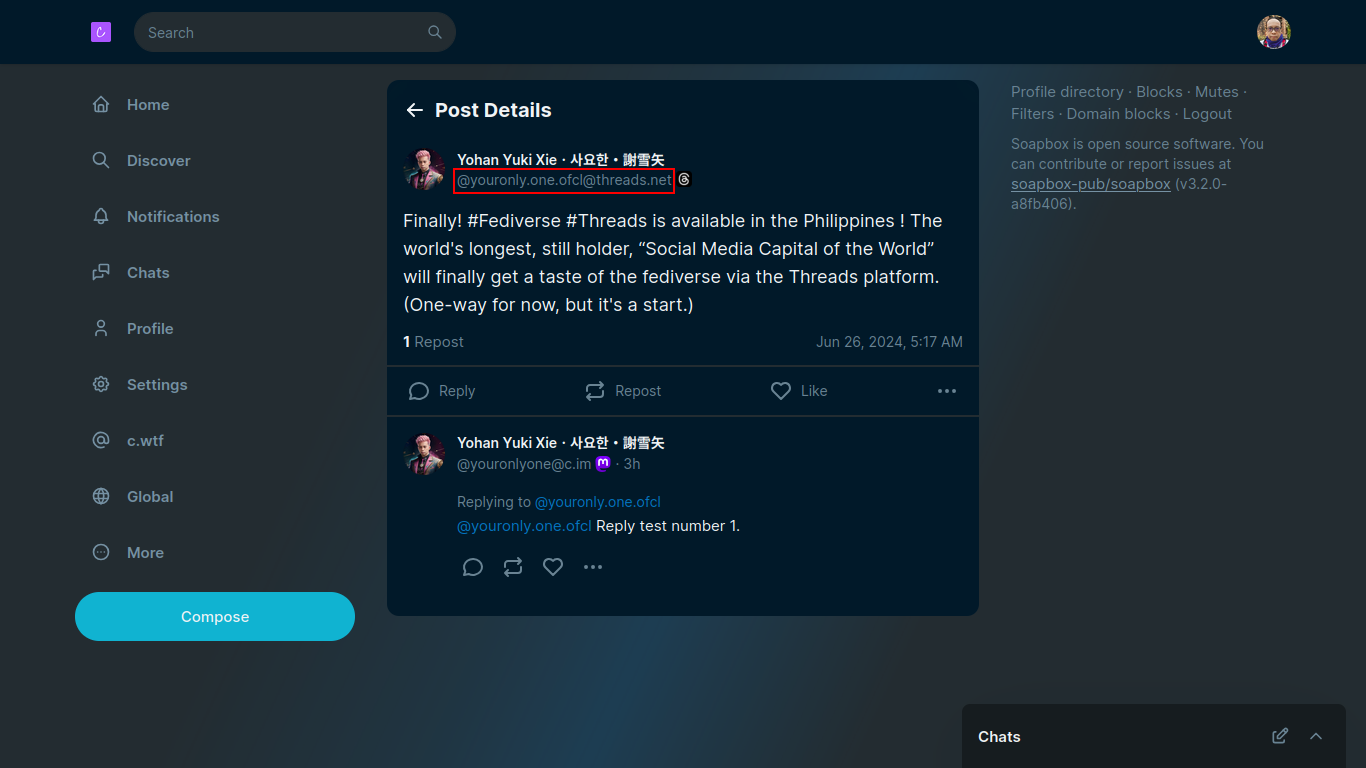
Threads.net post as seen on Mastodon-powered C.IM server
Threads.net post as seen on Mastodon-powered C.IM server by I’M YourOnly.One is
licensed under Creative Commons Attribution-ShareAlike (CC By-SA) 4.0 International License.
Date: 2024-06-26T05:27:12+08:00
Threads.net post as seen on Rebased-powered C.WTF server
Threads.net post as seen on Rebased-powered C.WTF server by I’M YourOnly.One is
licensed under Creative Commons Attribution-ShareAlike (CC By-SA) 4.0 International License.
Date: 2024-06-26T09:21:16+08:00
A friendly note: It’s still being tested
As of 2024-06-26, interoperability with the Fediverse via the ActivityPub protocol is still undergoing thorough testing. Expect some limitations in interaction for now, such as:
- Not all replies from the wider Fediverse may appear on Threads.net.
- Only the original post creator will see replies from the Fediverse.
- Threads.net users currently cannot reply to replies from Fediverse users.
- Posts may take at least five minutes to appear in both directions.
- Threads.net accounts cannot yet follow or search for Fediverse accounts.
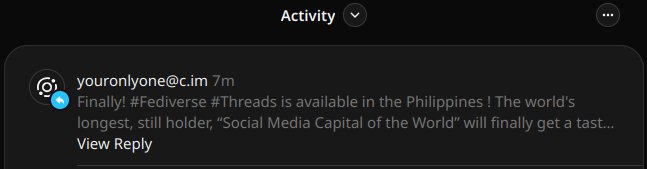
Notification of a Fediverse reply
Notification of a Fediverse reply by I’M YourOnly.One is
licensed under Creative Commons Attribution-ShareAlike (CC By-SA) 4.0 International License.
Date: 2024-06-26T05:27:17+08:00
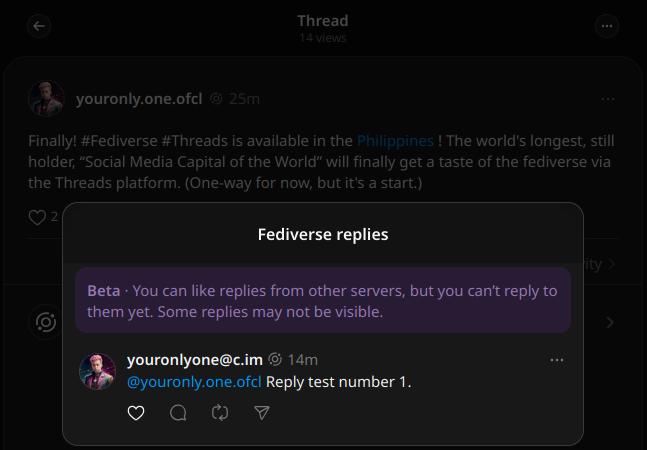
Fediverse reply on Threads.net
Fediverse reply on Threads.net by I’M YourOnly.One is
licensed under Creative Commons Attribution-ShareAlike (CC By-SA) 4.0 International License.
Date: 2024-06-26T05:27:24+08:00
Once again, welcome to the Fediverse mycelium network, powered by the standards-based ActivityPub protocol! Embrace this new way of connecting and enjoy the expanded reach of your online account!